Difference between revisions of "Author-Moira"
(→P - T: periwinkle) |
(→J - R: wip save Kiyoko art) |
||
| (11 intermediate revisions by the same user not shown) | |||
| Line 136: | Line 136: | ||
Nude=[[File:Behemoth-Moira-Full-Nude.png|300px]] | Nude=[[File:Behemoth-Moira-Full-Nude.png|300px]] | ||
</tabber> | </tabber> | ||
| − | |valign="top"|{{#tag:tabber| | + | |valign="top"|[[Brienne]]{{#tag:tabber| |
V2={{#tag:tabber| | V2={{#tag:tabber| | ||
Normal={{#tag:tabber| | Normal={{#tag:tabber| | ||
| Line 217: | Line 217: | ||
}} | }} | ||
}} | }} | ||
| + | |valign="top"|[[Brint]]<tabber> | ||
| + | Full=[[File:Brint-Moira-Full.png|300px]] | ||
| + | |-| | ||
| + | Nude=[[File:Brint-Moira-Full-Nude.png|300px]] | ||
| + | </tabber> | ||
| + | |- | ||
|valign="top"|[[Cait]]{{#tag:tabber| | |valign="top"|[[Cait]]{{#tag:tabber| | ||
Catfolk={{#tag:tabber| | Catfolk={{#tag:tabber| | ||
| Line 302: | Line 308: | ||
</tabber> | </tabber> | ||
}} | }} | ||
| − | |||
|valign="top"|[[Calise]]{{#tag:tabber| | |valign="top"|[[Calise]]{{#tag:tabber| | ||
Normal=<tabber> | Normal=<tabber> | ||
| Line 337: | Line 342: | ||
Full=[[File:Elf Boy-Moira-Full.png|300px]] | Full=[[File:Elf Boy-Moira-Full.png|300px]] | ||
</tabber> | </tabber> | ||
| + | |- | ||
|valign="top"|[[Elthara]]<tabber> | |valign="top"|[[Elthara]]<tabber> | ||
Combat=[[File:Elthara-Moira-Full-Combat.png|300px]] | Combat=[[File:Elthara-Moira-Full-Combat.png|300px]] | ||
| Line 344: | Line 350: | ||
Nude=[[File:Elthara-Moira-Full-Nude.png|300px]] | Nude=[[File:Elthara-Moira-Full-Nude.png|300px]] | ||
</tabber> | </tabber> | ||
| − | |||
|valign="top"|[[Eubicha]]<tabber> | |valign="top"|[[Eubicha]]<tabber> | ||
Clothed=[[File:Eubicha-Moira-Full.png|300px]] | Clothed=[[File:Eubicha-Moira-Full.png|300px]] | ||
| Line 387: | Line 392: | ||
</tabber> | </tabber> | ||
}} | }} | ||
| + | |- | ||
|valign="top"|[[Hana]]<tabber> | |valign="top"|[[Hana]]<tabber> | ||
Clothed=[[File:Hana-Moira-Full.png|300px]] | Clothed=[[File:Hana-Moira-Full.png|300px]] | ||
| Line 394: | Line 400: | ||
Nude=[[File:Hana-Moira-Full-Nude.png|300px]] | Nude=[[File:Hana-Moira-Full-Nude.png|300px]] | ||
</tabber> | </tabber> | ||
| − | |||
|valign="top"|[[Hashat]]<tabber> | |valign="top"|[[Hashat]]<tabber> | ||
Clothed=[[File:Hashat-Moira-Full.png|300px]] | Clothed=[[File:Hashat-Moira-Full.png|300px]] | ||
| Line 482: | Line 487: | ||
}} | }} | ||
}} | }} | ||
| − | |width="20%" valign="top"|[[ | + | |width="20%" valign="top"|[[Kiyoko]]{{#tag:tabber| |
| − | + | 4-Tail={{#tag:tabber| | |
| − | + | Normal=<tabber> | |
| − | Clothed=[[File: | + | Clothed=[[File:Kiyoko-Moira-Full-4T.png|300px]] |
|-| | |-| | ||
| − | Nude=[[File: | + | Nude=[[File:Kiyoko-Moira-Full-4T-Nude.png|300px]] |
</tabber> | </tabber> | ||
{{!}}-{{!}} | {{!}}-{{!}} | ||
| − | + | Pregnant=<tabber> | |
| − | Clothed=[[File: | + | Clothed=[[File:Kiyoko-Moira-Full-4T-Preg.png|300px]] |
|-| | |-| | ||
| − | Nude=[[File: | + | Nude=[[File:Kiyoko-Moira-Full-4T-Preg-Nude.png|300px]] |
</tabber> | </tabber> | ||
}} | }} | ||
{{!}}-{{!}} | {{!}}-{{!}} | ||
| − | + | 5-Tail={{#tag:tabber| | |
| − | |||
| − | |||
| − | |||
| − | |||
| − | |||
Normal=<tabber> | Normal=<tabber> | ||
| − | Clothed=[[File: | + | Clothed=[[File:Kiyoko-Moira-Full-5T.png|300px]] |
|-| | |-| | ||
| − | + | Nude=[[File:Kiyoko-Moira-Full-5T-Nude.png|300px]] | |
| + | </tabber> | ||
| + | {{!}}-{{!}} | ||
| + | Pregnant=<tabber> | ||
| + | Clothed=[[File:Kiyoko-Moira-Full-5T-Preg.png|300px]] | ||
|-| | |-| | ||
| − | Nude=[[File: | + | Nude=[[File:Kiyoko-Moira-Full-5T-Preg-Nude.png|300px]] |
</tabber> | </tabber> | ||
| + | }} | ||
{{!}}-{{!}} | {{!}}-{{!}} | ||
| − | + | 6-Tail={{#tag:tabber| | |
| − | + | Normal=<tabber> | |
| − | Clothed=[[File: | + | Clothed=[[File:Kiyoko-Moira-Full-6T.png|300px]] |
|-| | |-| | ||
| − | Nude=[[File: | + | Nude=[[File:Kiyoko-Moira-Full-6T-Nude.png|300px]] |
</tabber> | </tabber> | ||
{{!}}-{{!}} | {{!}}-{{!}} | ||
| − | + | Pregnant=<tabber> | |
| − | Clothed=[[File: | + | Clothed=[[File:Kiyoko-Moira-Full-6T-Preg.png|300px]] |
|-| | |-| | ||
| − | Nude=[[File: | + | Nude=[[File:Kiyoko-Moira-Full-6T-Preg-Nude.png|300px]] |
</tabber> | </tabber> | ||
}} | }} | ||
{{!}}-{{!}} | {{!}}-{{!}} | ||
| − | + | 7-Tail={{#tag:tabber| | |
| − | Clothed=[[File: | + | Normal=<tabber> |
| + | Clothed=[[File:Kiyoko-Moira-Full-7T.png|300px]] | ||
|-| | |-| | ||
| − | Nude=[[File: | + | Nude=[[File:Kiyoko-Moira-Full-7T-Nude.png|300px]] |
</tabber> | </tabber> | ||
| − | }} | + | {{!}}-{{!}} |
| − | + | Pregnant=<tabber> | |
| − | Clothed=[[File: | + | Clothed=[[File:Kiyoko-Moira-Full-7T-Preg.png|300px]] |
|-| | |-| | ||
| − | Nude=[[File: | + | Nude=[[File:Kiyoko-Moira-Full-7T-Preg-Nude.png|300px]] |
</tabber> | </tabber> | ||
| − | | | + | }} |
| − | + | {{!}}-{{!}} | |
| + | 8-Tail={{#tag:tabber| | ||
| + | Normal=<tabber> | ||
| + | Clothed=[[File:Kiyoko-Moira-Full-8T.png|300px]] | ||
|-| | |-| | ||
| − | Nude=[[File: | + | Nude=[[File:Kiyoko-Moira-Full-8T-Nude.png|300px]] |
</tabber> | </tabber> | ||
| − | + | {{!}}-{{!}} | |
| − | + | Pregnant=<tabber> | |
| + | Clothed=[[File:Kiyoko-Moira-Full-8T-Preg.png|300px]] | ||
|-| | |-| | ||
| − | + | Nude=[[File:Kiyoko-Moira-Full-8T-Preg-Nude.png|300px]] | |
</tabber> | </tabber> | ||
| − | | | + | }} |
| − | + | {{!}}-{{!}} | |
| + | 9-Tail={{#tag:tabber| | ||
| + | Normal=<tabber> | ||
| + | Clothed=[[File:Kiyoko-Moira-Full-9T.png|300px]] | ||
|-| | |-| | ||
| − | + | Nude=[[File:Kiyoko-Moira-Full-9T-Nude.png|300px]] | |
| + | </tabber> | ||
| + | {{!}}-{{!}} | ||
| + | Pregnant=<tabber> | ||
| + | Clothed=[[File:Kiyoko-Moira-Full-9T-Preg.png|300px]] | ||
|-| | |-| | ||
| − | + | Nude=[[File:Kiyoko-Moira-Full-9T-Preg-Nude.png|300px]] | |
</tabber> | </tabber> | ||
| + | }} | ||
| + | }} | ||
|- | |- | ||
| − | |valign="top"|[[ | + | |valign="top"|[[Komari]]{{#tag:tabber| |
| − | |||
V2={{#tag:tabber| | V2={{#tag:tabber| | ||
| − | + | Current=<tabber> | |
| − | Clothed=[[File: | + | Clothed=[[File:Komari-Moira-Full-V2.png|300px]] |
|-| | |-| | ||
| − | Nude=[[File: | + | Nude=[[File:Komari-Moira-Full-V2-Nude.png|300px]] |
</tabber> | </tabber> | ||
{{!}}-{{!}} | {{!}}-{{!}} | ||
| − | + | Young=<tabber> | |
| − | + | Clothed=[[File:Komari-Moira-Full-V2-Young.png|300px]] | |
| − | |||
|-| | |-| | ||
| − | + | Nude=[[File:Komari-Moira-Full-V2-Young-Nude.png|300px]] | |
| − | |||
| − | |||
| − | |||
| − | |||
</tabber> | </tabber> | ||
| + | }} | ||
{{!}}-{{!}} | {{!}}-{{!}} | ||
| − | + | V1=<tabber> | |
| − | + | Clothed=[[File:Komari-Moira-Full-V1.png|300px]] | |
| + | </tabber> | ||
| + | }} | ||
| + | |width="20%" valign="top"|[[Kohaku]]{{#tag:tabber| | ||
| + | Normal=<tabber> | ||
| + | Clothed=[[File:Kohaku-Moira-Full.png|300px]] | ||
|-| | |-| | ||
| − | + | Alt Clothed=[[File:Kohaku-Moira-Full-Alt.png|300px]] | |
|-| | |-| | ||
| − | Stage | + | Nude=[[File:Kohaku-Moira-Full-Nude.png|300px]] |
| + | </tabber> | ||
| + | {{!}}-{{!}} | ||
| + | Pregnant={{#tag:tabber| | ||
| + | Stage 1=<tabber> | ||
| + | Clothed=[[File:Kohaku-Moira-Full-Preg-S1.png|300px]] | ||
|-| | |-| | ||
| − | + | Nude=[[File:Kohaku-Moira-Full-Preg-S1-Nude.png|300px]] | |
</tabber> | </tabber> | ||
| − | |||
{{!}}-{{!}} | {{!}}-{{!}} | ||
| − | + | Stage 2=<tabber> | |
| − | Clothed=[[File: | + | Clothed=[[File:Kohaku-Moira-Full-Preg-S2.png|300px]] |
|-| | |-| | ||
| − | Nude=[[File: | + | Nude=[[File:Kohaku-Moira-Full-Preg-S2-Nude.png|300px]] |
</tabber> | </tabber> | ||
}} | }} | ||
{{!}}-{{!}} | {{!}}-{{!}} | ||
| − | + | Post-Preg=<tabber> | |
| − | Clothed=[[File: | + | Clothed=[[File:Kohaku-Moira-Full-PostPreg.png|300px]] |
|-| | |-| | ||
| − | Nude=[[File: | + | Nude=[[File:Kohaku-Moira-Full-PostPreg-Nude.png|300px]] |
</tabber> | </tabber> | ||
}} | }} | ||
| − | + | |valign="top"|[[Kurako]]<tabber> | |
| − | + | Clothed=[[File:Kurako-Moira-Full.png|300px]] | |
| + | |-| | ||
| + | Nude=[[File:Kurako-Moira-Full-Nude.png|300px]] | ||
| + | </tabber> | ||
| + | |valign="top"|[[Lieutenant Jennavieve]]<tabber> | ||
| + | Full=[[File:Lieutenant Jennavieve-Moira-Full.png|300px]] | ||
| + | |-| | ||
| + | Nude=[[File:Lieutenant Jennavieve-Moira-Full-Nude.png|300px]] | ||
| + | </tabber> | ||
| + | |valign="top"|[[Lureling]]<tabber> | ||
| + | Full=[[File:Lureling-Moira-Full.png|300px]] | ||
| + | |-| | ||
| + | Silly Mode=[[File:Lureling-Moira-Full-Silly.png|300px]] | ||
| + | </tabber> | ||
| + | |- | ||
| + | |valign="top"|[[Lumia]]<tabber> | ||
| + | Armored=[[File:Lumia-Moira-Full-Armored.png|300px]] | ||
| + | |-| | ||
| + | Zoomed Armored=[[File:Lumia-Moira-Full-Armored-ZM.png|300px]] | ||
| + | |-| | ||
| + | Zoomed Nude=[[File:Lumia-Moira-Full-Nude-ZM.png|300px]] | ||
| + | </tabber> | ||
| + | |valign="top"|[[Miko & Mai]]{{#tag:tabber| | ||
| + | Miko={{#tag:tabber| | ||
V2={{#tag:tabber| | V2={{#tag:tabber| | ||
Normal=<tabber> | Normal=<tabber> | ||
| − | Clothed=[[File: | + | Clothed=[[File:Miko-Moira-Full-V2.png|300px]] |
|-| | |-| | ||
| − | Nude=[[File: | + | Nude=[[File:Miko-Moira-Full-V2-Nude.png|300px]] |
</tabber> | </tabber> | ||
{{!}}-{{!}} | {{!}}-{{!}} | ||
Pregnant={{#tag:tabber| | Pregnant={{#tag:tabber| | ||
Clothed=<tabber> | Clothed=<tabber> | ||
| − | Stage 1 | + | Stage 1=[[File:Miko-Moira-Full-V2-Preg-S1.png|300px]] |
|-| | |-| | ||
| − | Stage 3=[[File: | + | Stage 2=[[File:Miko-Moira-Full-V2-Preg-S2.png|300px]] |
| + | |-| | ||
| + | Stage 3=[[File:Miko-Moira-Full-V2-Preg-S3.png|300px]] | ||
| + | |-| | ||
| + | Stage 4=[[File:Miko-Moira-Full-V2-Preg-S4.png|300px]] | ||
</tabber> | </tabber> | ||
{{!}}-{{!}} | {{!}}-{{!}} | ||
Nude=<tabber> | Nude=<tabber> | ||
| − | Stage 1-2=[[File: | + | Stage 1=[[File:Miko-Moira-Full-V2-Preg-S1-Nude.png|300px]] |
| + | |-| | ||
| + | Stage 2=[[File:Miko-Moira-Full-V2-Preg-S2-Nude.png|300px]] | ||
| + | |-| | ||
| + | Stage 3=[[File:Miko-Moira-Full-V2-Preg-S3-Nude.png|300px]] | ||
|-| | |-| | ||
| − | Stage | + | Stage 4=[[File:Miko-Moira-Full-V2-Preg-S4-Nude.png|300px]] |
</tabber> | </tabber> | ||
}} | }} | ||
{{!}}-{{!}} | {{!}}-{{!}} | ||
PostPreg=<tabber> | PostPreg=<tabber> | ||
| − | Clothed=[[File: | + | Clothed=[[File:Miko-Moira-Full-V2-PostPreg.png|300px]] |
|-| | |-| | ||
| − | Nude=[[File: | + | Nude=[[File:Miko-Moira-Full-V2-PostPreg-Nude.png|300px]] |
</tabber> | </tabber> | ||
}} | }} | ||
{{!}}-{{!}} | {{!}}-{{!}} | ||
V1=<tabber> | V1=<tabber> | ||
| − | Clothed=[[File: | + | Clothed=[[File:Miko-Moira-Full-V1.png|300px]] |
|-| | |-| | ||
| − | Nude=[[File: | + | Nude=[[File:Miko-Moira-Full-V1-Nude.png|300px]] |
</tabber> | </tabber> | ||
}} | }} | ||
| − | }} | + | {{!}}-{{!}} |
| − | | | + | Mai={{#tag:tabber| |
| − | Clothed=[[File: | + | V2={{#tag:tabber| |
| + | Normal=<tabber> | ||
| + | Clothed=[[File:Mai-Moira-Full-V2.png|300px]] | ||
|-| | |-| | ||
| − | Nude=[[File: | + | Nude=[[File:Mai-Moira-Full-V2-Nude.png|300px]] |
</tabber> | </tabber> | ||
| − | + | {{!}}-{{!}} | |
| − | + | Pregnant={{#tag:tabber| | |
| − | + | Clothed=<tabber> | |
| − | + | Stage 1-2=[[File:Mai-Moira-Full-V2-Preg-S1.png|300px]] | |
| − | |||
|-| | |-| | ||
| − | + | Stage 3=[[File:Mai-Moira-Full-V2-Preg-S1-Nude.png|300px]] | |
</tabber> | </tabber> | ||
| − | + | {{!}}-{{!}} | |
| − | + | Nude=<tabber> | |
| − | + | Stage 1-2=[[File:Mai-Moira-Full-V2-Preg-S2.png|300px]] | |
| − | |||
| − | |||
| − | |||
|-| | |-| | ||
| − | + | Stage 3=[[File:Mai-Moira-Full-V2-Preg-S2-Nude.png|300px]] | |
</tabber> | </tabber> | ||
| − | + | }} | |
| − | Clothed=[[File: | + | {{!}}-{{!}} |
| + | PostPreg=<tabber> | ||
| + | Clothed=[[File:Mai-Moira-Full-V2-PostPreg.png|300px]] | ||
|-| | |-| | ||
| − | Nude=[[File: | + | Nude=[[File:Mai-Moira-Full-V2-PostPreg-Nude.png|300px]] |
</tabber> | </tabber> | ||
| − | + | }} | |
| − | + | {{!}}-{{!}} | |
| − | + | V1=<tabber> | |
| − | Clothed=[[File: | + | Clothed=[[File:Mai-Moira-Full-V1.png|300px]] |
|-| | |-| | ||
| − | Nude=[[File: | + | Nude=[[File:Mai-Moira-Full-V1-Nude.png|300px]] |
| + | </tabber> | ||
| + | }} | ||
| + | }} | ||
| + | |valign="top"|[[Mallach]]<tabber> | ||
| + | Clothed=[[File:Mallach-Moira-Full.png|300px]] | ||
|-| | |-| | ||
| − | Nude | + | Nude=[[File:Mallach-Moira-Full-Nude.png|300px]] |
| − | | | + | </tabber> |
| − | + | |valign="top"|[[Master Tollus]]<tabber> | |
| + | Full=[[File:Master Tollus-Moira-Full.png|300px]] | ||
</tabber> | </tabber> | ||
| − | + | |valign="top"|[[Nakano]]<tabber> | |
| − | + | Full=[[File:Nakano-Moira-Full.png|300px]] | |
| − | |||
|-| | |-| | ||
| − | + | Full (helmet)=[[File:Nakano-Moira-Full-Helmet.png|300px]] | |
</tabber> | </tabber> | ||
| − | + | |- | |
| − | + | |valign="top"|[[Nareva]]<tabber> | |
| − | + | Full=[[File:Nareva-Moira-Full.png|300px]] | |
| − | Clothed=[[File: | + | </tabber> |
| + | |valign="top"|[[Ninian]]<tabber> | ||
| + | Clothed=[[File:Ninian-Moira-Full.png|300px]] | ||
| + | |-| | ||
| + | Nude=[[File:Ninian-Moira-Full-Nude.png|300px]] | ||
| + | </tabber> | ||
| + | |valign="top"|[[Prince Nyze]]<tabber> | ||
| + | Clothed=[[File:Prince Nyze-Moira-Full.png|300px]] | ||
|-| | |-| | ||
| − | Nude=[[File:Queen Alissa-Moira-Full | + | Nude=[[File:Prince Nyze-Moira-Full-Nude.png|300px]] |
| + | </tabber> | ||
| + | |valign="top"|[[Queen Alissa]]{{#tag:tabber| | ||
| + | Boreal Elf={{#tag:tabber| | ||
| + | Normal=<tabber> | ||
| + | Clothed=[[File:Queen Alissa-Moira-Full.png|300px]] | ||
|-| | |-| | ||
| − | Nude | + | Nude=[[File:Queen Alissa-Moira-Full-Nude.png|300px]] |
|-| | |-| | ||
| − | Nude ( | + | Nude (w/cock)=[[File:Queen Alissa-Moira-Full-Nude-Cock.png|300px]] |
| − | |||
| − | |||
| − | |||
| − | |||
| − | |||
|-| | |-| | ||
| − | Nude=[[File:Queen | + | Nude (caged)=[[File:Queen Alissa-Moira-Full-Nude-Caged.png|300px]] |
</tabber> | </tabber> | ||
{{!}}-{{!}} | {{!}}-{{!}} | ||
| − | Cleansed=<tabber> | + | Pregnant=<tabber> |
| − | Clothed=[[File:Queen Nyzerrah-Moira-Full-Pure.png|300px]] | + | Clothed=[[File:Queen Alissa-Moira-Full-Preg.png|300px]] |
| + | |-| | ||
| + | Nude=[[File:Queen Alissa-Moira-Full-Preg-Nude.png|300px]] | ||
| + | </tabber> | ||
| + | }} | ||
| + | {{!}}-{{!}} | ||
| + | Demon=<tabber> | ||
| + | Clothed=[[File:Queen Alissa-Moira-Full-Demon.png|300px]] | ||
| + | |-| | ||
| + | Nude=[[File:Queen Alissa-Moira-Full-Demon-Nude.png|300px]] | ||
| + | |-| | ||
| + | Nude (w/cock)=[[File:Queen Alissa-Moira-Full-Demon-Nude-Cock.png|300px]] | ||
| + | |-| | ||
| + | Nude (caged)=[[File:Queen Alissa-Moira-Full-Demon-Nude-Caged.png|300px]] | ||
| + | </tabber> | ||
| + | }} | ||
| + | |valign="top"|[[Queen Nyzerrah]]{{#tag:tabber| | ||
| + | Bimbo=<tabber> | ||
| + | Clothed=[[File:Queen Nyzerrah-Moira-Full.png|300px]] | ||
| + | |-| | ||
| + | Nude=[[File:Queen Nyzerrah-Moira-Full-Nude.png|300px]] | ||
| + | </tabber> | ||
| + | {{!}}-{{!}} | ||
| + | Cleansed=<tabber> | ||
| + | Clothed=[[File:Queen Nyzerrah-Moira-Full-Pure.png|300px]] | ||
|-| | |-| | ||
Nude=[[File:Queen Nyzerrah-Moira-Full-Pure-Nude.png|300px]] | Nude=[[File:Queen Nyzerrah-Moira-Full-Pure-Nude.png|300px]] | ||
</tabber> | </tabber> | ||
}} | }} | ||
| + | |- | ||
|valign="top"|[[Quintillus]]<tabber> | |valign="top"|[[Quintillus]]<tabber> | ||
Clothed=[[File:Quintillus-Moira-Full.png|300px]] | Clothed=[[File:Quintillus-Moira-Full.png|300px]] | ||
| Line 709: | Line 800: | ||
Nude=[[File:Quintillus-Moira-Full-Nude.png|300px]] | Nude=[[File:Quintillus-Moira-Full-Nude.png|300px]] | ||
</tabber> | </tabber> | ||
| − | |||
|valign="top"|[[Rindo]]<tabber> | |valign="top"|[[Rindo]]<tabber> | ||
Clothed=[[File:Rindo-Moira-Full.png|300px]] | Clothed=[[File:Rindo-Moira-Full.png|300px]] | ||
| Line 841: | Line 931: | ||
Nude=[[File:Arille-Moira-Bust-Nude.png|250px]] | Nude=[[File:Arille-Moira-Bust-Nude.png|250px]] | ||
</tabber> | </tabber> | ||
| − | |valign="top"|[[ | + | |valign="top"|[[Asgeir]]<tabber> |
| − | Clothed=[[File: | + | Clothed=[[File:Asgeir-Moira-Bust.png|250px]] |
|-| | |-| | ||
| − | Nude=[[File: | + | Nude=[[File:Asgeir-Moira-Bust-Nude.png|250px]] |
</tabber> | </tabber> | ||
|- | |- | ||
| Line 919: | Line 1,009: | ||
</tabber> | </tabber> | ||
}} | }} | ||
| + | |valign="top"|[[Caedlan]]<tabber> | ||
| + | Clothed=[[File:Caedlan-Moira-Bust.png|250px]] | ||
| + | |-| | ||
| + | Nude=[[File:Caedlan-Moira-Bust-Nude.png|250px]] | ||
| + | |-| | ||
| + | Nude (big)=[[File:Caedlan-Moira-Bust-Big-Nude.png|250px]] | ||
| + | </tabber> | ||
| + | |- | ||
|valign="top"|[[Captain Fenraus]]<tabber> | |valign="top"|[[Captain Fenraus]]<tabber> | ||
Clothed=[[File:Captain Fenraus-Moira-Bust.png|250px]] | Clothed=[[File:Captain Fenraus-Moira-Bust.png|250px]] | ||
| Line 924: | Line 1,022: | ||
Nude=[[File:Captain Fenraus-Moira-Bust-Nude.png|250px]] | Nude=[[File:Captain Fenraus-Moira-Bust-Nude.png|250px]] | ||
</tabber> | </tabber> | ||
| − | |||
|valign="top"|[[Captain Livernon]]<tabber> | |valign="top"|[[Captain Livernon]]<tabber> | ||
Clothed=[[File:Captain Livernon-Moira-Bust.png|250px]] | Clothed=[[File:Captain Livernon-Moira-Bust.png|250px]] | ||
| Line 1,020: | Line 1,117: | ||
</tabber> | </tabber> | ||
}} | }} | ||
| + | |- | ||
|valign="top"|[[Clementine]]<tabber> | |valign="top"|[[Clementine]]<tabber> | ||
Clothed=[[File:Clementine-Moira-Bust.png|250px]] | Clothed=[[File:Clementine-Moira-Bust.png|250px]] | ||
| Line 1,025: | Line 1,123: | ||
Nude=[[File:Clementine-Moira-Bust-Nude.png|250px]] | Nude=[[File:Clementine-Moira-Bust-Nude.png|250px]] | ||
</tabber> | </tabber> | ||
| − | |||
|valign="top"|[[Coraline]]<tabber> | |valign="top"|[[Coraline]]<tabber> | ||
Clothed=[[File:Coraline-Moira-Bust.png|250px]] | Clothed=[[File:Coraline-Moira-Bust.png|250px]] | ||
| Line 1,049: | Line 1,146: | ||
Nude=[[File:Darius-Moira-Bust-Nude.png|250px]] | Nude=[[File:Darius-Moira-Bust-Nude.png|250px]] | ||
</tabber> | </tabber> | ||
| + | |- | ||
|valign="top"|[[Decima]]<tabber> | |valign="top"|[[Decima]]<tabber> | ||
Clothed=[[File:Decima-Moira-Bust.png|250px]] | Clothed=[[File:Decima-Moira-Bust.png|250px]] | ||
| Line 1,056: | Line 1,154: | ||
Nude (milky)=[[File:Decima-Moira-Bust-Nude-Milky.png|250px]] | Nude (milky)=[[File:Decima-Moira-Bust-Nude-Milky.png|250px]] | ||
</tabber> | </tabber> | ||
| − | |||
|valign="top"|[[Dior & Betas]]{{#tag:tabber| | |valign="top"|[[Dior & Betas]]{{#tag:tabber| | ||
Group=[[File:FuckTrio.Moira.Full.png|250px]] | Group=[[File:FuckTrio.Moira.Full.png|250px]] | ||
| Line 1,076: | Line 1,173: | ||
|valign="top"|[[Drifa]]{{#tag:tabber| | |valign="top"|[[Drifa]]{{#tag:tabber| | ||
Pure={{#tag:tabber| | Pure={{#tag:tabber| | ||
| + | Normal={{#tag:tabber| | ||
Normal=<tabber> | Normal=<tabber> | ||
Clothed=[[File:Drifa-Moira-Bust.png|250px]] | Clothed=[[File:Drifa-Moira-Bust.png|250px]] | ||
| Line 1,087: | Line 1,185: | ||
Nude=[[File:Drifa-Moira-Bust-Busty-Nude.png|250px]] | Nude=[[File:Drifa-Moira-Bust-Busty-Nude.png|250px]] | ||
</tabber> | </tabber> | ||
| + | }} | ||
| + | {{!}}-{{!}} | ||
| + | Pregnant={{#tag:tabber| | ||
| + | Normal=<tabber> | ||
| + | Clothed=[[File:Drifa-Moira-Bust-Preg.png|250px]] | ||
| + | |-| | ||
| + | Nude=[[File:Drifa-Moira-Bust-Preg-Nude.png|250px]] | ||
| + | </tabber> | ||
| + | {{!}}-{{!}} | ||
| + | Busty=<tabber> | ||
| + | Clothed=[[File:Drifa-Moira-Bust-Preg-Busty.png|250px]] | ||
| + | |-| | ||
| + | Nude=[[File:Drifa-Moira-Bust-Preg-Busty-Nude.png|250px]] | ||
| + | </tabber> | ||
| + | }} | ||
}} | }} | ||
{{!}}-{{!}} | {{!}}-{{!}} | ||
Corrupted={{#tag:tabber| | Corrupted={{#tag:tabber| | ||
| + | Normal={{#tag:tabber| | ||
Normal=<tabber> | Normal=<tabber> | ||
Clothed=[[File:Drifa-Moira-Bust-Corrupted.png|250px]] | Clothed=[[File:Drifa-Moira-Bust-Corrupted.png|250px]] | ||
| Line 1,101: | Line 1,215: | ||
Nude=[[File:Drifa-Moira-Bust-Corrupted-Busty-Nude.png|250px]] | Nude=[[File:Drifa-Moira-Bust-Corrupted-Busty-Nude.png|250px]] | ||
</tabber> | </tabber> | ||
| + | }} | ||
| + | {{!}}-{{!}} | ||
| + | Pregnant={{#tag:tabber| | ||
| + | Normal=<tabber> | ||
| + | Clothed=[[File:Drifa-Moira-Bust-Corrupted-Preg.png|250px]] | ||
| + | |-| | ||
| + | Nude=[[File:Drifa-Moira-Bust-Corrupted-Preg-Nude.png|250px]] | ||
| + | </tabber> | ||
| + | {{!}}-{{!}} | ||
| + | Busty=<tabber> | ||
| + | Clothed=[[File:Drifa-Moira-Bust-Corrupted-Preg-Busty.png|250px]] | ||
| + | |-| | ||
| + | Nude=[[File:Drifa-Moira-Bust-Corrupted-Preg-Busty-Nude.png|250px]] | ||
| + | </tabber> | ||
| + | }} | ||
}} | }} | ||
}} | }} | ||
| Line 1,121: | Line 1,250: | ||
</tabber> | </tabber> | ||
}} | }} | ||
| + | |- | ||
|valign="top"|[[Electirc Eel]]<tabber> | |valign="top"|[[Electirc Eel]]<tabber> | ||
Bust=[[File:Electirc Eel-Moira-Bust.png|250px]] | Bust=[[File:Electirc Eel-Moira-Bust.png|250px]] | ||
</tabber> | </tabber> | ||
| − | |||
|valign="top"|[[Elosa]]<tabber> | |valign="top"|[[Elosa]]<tabber> | ||
Bust=[[File:Elosa-Moira-Bust.png|250px]] | Bust=[[File:Elosa-Moira-Bust.png|250px]] | ||
| Line 1,156: | Line 1,285: | ||
Nude=[[File:Etheryn Clone-Moira-Bust-Nude.png|250px]] | Nude=[[File:Etheryn Clone-Moira-Bust-Nude.png|250px]] | ||
</tabber> | </tabber> | ||
| + | |- | ||
|valign="top"|[[Evelyn]] (dragon)<tabber> | |valign="top"|[[Evelyn]] (dragon)<tabber> | ||
Clothed=[[File:Evelyn-Moira-Bust-Dragon.png|250px]] | Clothed=[[File:Evelyn-Moira-Bust-Dragon.png|250px]] | ||
| Line 1,329: | Line 1,459: | ||
}} | }} | ||
}} | }} | ||
| + | |valign="top"|[[Iavari Twins]] (Rosalia & Rosaline)<tabber> | ||
| + | Clothed=[[File:Iavari Twins-Moira-Bust.png|250px]] | ||
| + | |-| | ||
| + | Nude=[[File:Iavari Twins-Moira-Bust-Nude.png|250px]] | ||
| + | </tabber> | ||
|valign="top"|[[Ihzalti]]<tabber> | |valign="top"|[[Ihzalti]]<tabber> | ||
Clothed=[[File:Ihzalti-Moira-Bust.png|250px]] | Clothed=[[File:Ihzalti-Moira-Bust.png|250px]] | ||
| Line 1,344: | Line 1,479: | ||
Nude=[[File:Imora-Moira-Bust-Nude.png|250px]] | Nude=[[File:Imora-Moira-Bust-Nude.png|250px]] | ||
</tabber> | </tabber> | ||
| + | |- | ||
|valign="top"|[[Inaya]]<tabber> | |valign="top"|[[Inaya]]<tabber> | ||
Bust=[[File:Inaya-Moira-Bust.png|250px]] | Bust=[[File:Inaya-Moira-Bust.png|250px]] | ||
</tabber> | </tabber> | ||
| − | |||
|valign="top"|[[Incubus Blackguard]]<tabber> | |valign="top"|[[Incubus Blackguard]]<tabber> | ||
Bust=[[File:Incubus Blackguard-Moira-Bust.png|250px]] | Bust=[[File:Incubus Blackguard-Moira-Bust.png|250px]] | ||
| Line 1,379: | Line 1,514: | ||
</tabber> | </tabber> | ||
}} | }} | ||
| + | |- | ||
|valign="top"|[[Jarl Talraed]]<tabber> | |valign="top"|[[Jarl Talraed]]<tabber> | ||
Bust=[[File:Jarl Talraed-Moira-Bust.png|250px]] | Bust=[[File:Jarl Talraed-Moira-Bust.png|250px]] | ||
</tabber> | </tabber> | ||
| − | |||
|valign="top"|[[Jotun Giant-Father]]<tabber> | |valign="top"|[[Jotun Giant-Father]]<tabber> | ||
Bust=[[File:Jotun Giant-Father-Moira-Bust.png|250px]] | Bust=[[File:Jotun Giant-Father-Moira-Bust.png|250px]] | ||
| Line 1,922: | Line 2,057: | ||
|-| | |-| | ||
Milky=[[File:Periwinkle-Moira-Bust-Nude-Milky.png|250px]] | Milky=[[File:Periwinkle-Moira-Bust-Nude-Milky.png|250px]] | ||
| + | </tabber> | ||
| + | |valign="top" width="16.2%"|[[Pink Succubus]]<tabber> | ||
| + | Bust=[[File:Pink Succubus-Moira-Bust.png|250px]] | ||
</tabber> | </tabber> | ||
|valign="top" width="16.2%"|[[Piperita]]<tabber> | |valign="top" width="16.2%"|[[Piperita]]<tabber> | ||
| Line 1,933: | Line 2,071: | ||
Nude=[[File:Prince Vrannus-Moira-Bust-Nude.png|250px]] | Nude=[[File:Prince Vrannus-Moira-Bust-Nude.png|250px]] | ||
</tabber> | </tabber> | ||
| − | |valign="top | + | |- |
| + | |valign="top"|[[Princess Iveryn]]<tabber> | ||
Bust=[[File:Princess Iveryn-Moira-Bust.png|250px]] | Bust=[[File:Princess Iveryn-Moira-Bust.png|250px]] | ||
</tabber> | </tabber> | ||
| − | |||
|valign="top" width="16.2%"|[[Princess Varnea]]<tabber> | |valign="top" width="16.2%"|[[Princess Varnea]]<tabber> | ||
Dress=[[File:Princess Varena-Moira-Bust.png|250px]] | Dress=[[File:Princess Varena-Moira-Bust.png|250px]] | ||
| Line 1,959: | Line 2,097: | ||
|-| | |-| | ||
Nude=[[File:Queen Atheldred-Moira-Bust-Nude.png|250px]] | Nude=[[File:Queen Atheldred-Moira-Bust-Nude.png|250px]] | ||
| + | </tabber> | ||
| + | |valign="top"|[[Radmus]]<tabber> | ||
| + | Bust=[[File:Radmus-Moira-Bust.png|250px]] | ||
</tabber> | </tabber> | ||
|valign="top"|[[Ragnild]]{{#tag:tabber| | |valign="top"|[[Ragnild]]{{#tag:tabber| | ||
| Line 1,973: | Line 2,114: | ||
</tabber> | </tabber> | ||
}} | }} | ||
| + | |- | ||
| + | |valign="top"|[[Ramien]]<tabber> | ||
| + | Clothed=[[File:Ramien-Moira-Bust.png|250px]] | ||
| + | |-| | ||
| + | Nude (corrupted)=[[File:Ramien-Moira-Bust-Corrupted-Nude.png|250px]] | ||
| + | </tabber> | ||
|valign="top"|[[Ranna]]<tabber> | |valign="top"|[[Ranna]]<tabber> | ||
Bust=[[File:Ranna-Moira-Bust.png|250px]] | Bust=[[File:Ranna-Moira-Bust.png|250px]] | ||
| Line 2,007: | Line 2,154: | ||
</tabber> | </tabber> | ||
}} | }} | ||
| − | |||
|valign="top"|[[Rindo]]{{#tag:tabber| | |valign="top"|[[Rindo]]{{#tag:tabber| | ||
Pregnant=<tabber> | Pregnant=<tabber> | ||
| Line 2,033: | Line 2,179: | ||
Nude=[[File:Rooh-Moira-Bust-Nude.png|250px]] | Nude=[[File:Rooh-Moira-Bust-Nude.png|250px]] | ||
</tabber> | </tabber> | ||
| + | |- | ||
|valign="top"|[[Rose]]<tabber> | |valign="top"|[[Rose]]<tabber> | ||
Clothed=[[File:Rose-Moira-Bust.png|250px]] | Clothed=[[File:Rose-Moira-Bust.png|250px]] | ||
| Line 2,048: | Line 2,195: | ||
Nude=[[File:Rune-Moira-Bust-Nude.png|250px]] | Nude=[[File:Rune-Moira-Bust-Nude.png|250px]] | ||
</tabber> | </tabber> | ||
| − | |||
|valign="top"|[[Sandre & Caera]]{{#tag:tabber| | |valign="top"|[[Sandre & Caera]]{{#tag:tabber| | ||
V2={{#tag:tabber| | V2={{#tag:tabber| | ||
| Line 2,140: | Line 2,286: | ||
Nude=[[File:Serena-Moira-Bust-Nude.png|250px]] | Nude=[[File:Serena-Moira-Bust-Nude.png|250px]] | ||
</tabber> | </tabber> | ||
| + | |- | ||
|valign="top"|[[Shadowlith]]<tabber> | |valign="top"|[[Shadowlith]]<tabber> | ||
Bust=[[File:Shadowlith-Moira-Bust.png|250px]] | Bust=[[File:Shadowlith-Moira-Bust.png|250px]] | ||
| Line 2,153: | Line 2,300: | ||
Nude (leash)=[[File:Solveig-Moira-Bust-Leash-Nude.png|250px]] | Nude (leash)=[[File:Solveig-Moira-Bust-Leash-Nude.png|250px]] | ||
</tabber> | </tabber> | ||
| − | |||
|valign="top"|[[Spectral Smith]]<tabber> | |valign="top"|[[Spectral Smith]]<tabber> | ||
Bust=[[File:Spectral Smith-Moira-Bust.png|250px]] | Bust=[[File:Spectral Smith-Moira-Bust.png|250px]] | ||
| Line 2,173: | Line 2,319: | ||
</tabber> | </tabber> | ||
}} | }} | ||
| + | |- | ||
|valign="top"|[[Tarandra]]<tabber> | |valign="top"|[[Tarandra]]<tabber> | ||
Normal=[[File:Tarandra-Moira-Bust.png|250px]] | Normal=[[File:Tarandra-Moira-Bust.png|250px]] | ||
| Line 2,198: | Line 2,345: | ||
</tabber> | </tabber> | ||
}} | }} | ||
| − | |||
|valign="top"|[[Tricia]]<tabber> | |valign="top"|[[Tricia]]<tabber> | ||
Clothed=[[File:Tricia-Moira-Bust.png|250px]] | Clothed=[[File:Tricia-Moira-Bust.png|250px]] | ||
| Line 2,304: | Line 2,450: | ||
Bust=[[File:Wyld Tree-Moira-Bust.png|250px]] | Bust=[[File:Wyld Tree-Moira-Bust.png|250px]] | ||
</tabber> | </tabber> | ||
| − | |valign="top"|[[Ylvid]]<tabber> | + | |valign="top"|[[Ylvid]]{{#tag:tabber| |
| + | Normal=<tabber> | ||
Clothed= [[File:Ylvid-Moira-Bust.png|250px]] | Clothed= [[File:Ylvid-Moira-Bust.png|250px]] | ||
|-| | |-| | ||
Nude=[[File:Ylvid-Moira-Bust-Nude.png|250px]] | Nude=[[File:Ylvid-Moira-Bust-Nude.png|250px]] | ||
</tabber> | </tabber> | ||
| + | {{!}}-{{!}} | ||
| + | Pregnant=<tabber> | ||
| + | Clothed=[[File:Ylvid-Moira-Bust-Preg.png|250px]] | ||
| + | |-| | ||
| + | Nude=[[File:Ylvid-Moira-Bust-Preg-Nude.png|250px]] | ||
| + | </tabber> | ||
| + | }} | ||
|valign="top"|[[Yolihuali]]{{#tag:tabber| | |valign="top"|[[Yolihuali]]{{#tag:tabber| | ||
Normal=<tabber> | Normal=<tabber> | ||
| Line 2,340: | Line 2,494: | ||
{|class="table" style="margin-left: auto; margin-right: auto; border: 2px solid #929292; cellpadding:1px; " | {|class="table" style="margin-left: auto; margin-right: auto; border: 2px solid #929292; cellpadding:1px; " | ||
|- | |- | ||
| − | |{{Headshot-index|name=Abyssal Thing|art=Moira}}{{Headshot-index|name=Ashelander|art=Moira|exte=Mace}}{{Headshot-index|name=Batfolk Mugger|art=Moira|exte=BoyR}}{{Headshot-index|name=Batfolk Mugger|art=Moira|exte=GirlR}}{{Headshot-index|name=Broken Psyche|art=Moira|exte=1}}{{Headshot-index|name=Broken Psyche|art=Moira|exte=2}}{{Headshot-index|name=Broken Psyche|art=Moira|exte=3}}{{Headshot-index|name= | + | |{{Headshot-index|name=Abyssal Thing|art=Moira}}{{Headshot-index|name=Ashelander|art=Moira|exte=Mace}}{{Headshot-index|name=Batfolk Mugger|art=Moira|exte=BoyR}}{{Headshot-index|name=Batfolk Mugger|art=Moira|exte=GirlR}}{{Headshot-index|name=Broken Psyche|art=Moira|exte=1}}{{Headshot-index|name=Broken Psyche|art=Moira|exte=2}}{{Headshot-index|name=Broken Psyche|art=Moira|exte=3}}{{Headshot-index|name=Captain Eyslaine|art=Moira}}{{Headshot-index|name=Cave Bear|art=Moira}}{{Headshot-index|name=Corrupt Dragon|art=Moira}} |
|- | |- | ||
| − | |{{Headshot-index|name=Corrupt Elf|art=Moira|exte=2}}{{Headshot-index|name=Corrupted Lupine|art=Moira}}{{Headshot-index|name=Crazy Horse|art=Moira|exte=Bl}}{{Headshot-index|name=Crazy Horse|art=Moira|exte=Br}}{{Headshot-index|name=Crazy Horse|art=Moira|exte=Wh}}{{Headshot-index|name=Cultist|exte=F|art=Moira}}{{Headshot-index|name=Cultist|exte=M|art=Moira}}{{Headshot-index|name=Cultist Barghest|art=Moira}}{{Headshot-index|name=Cultist Demontaur|art=Moira|exte=1 | + | |{{Headshot-index|name=Corrupt Elf|art=Moira|exte=1}}{{Headshot-index|name=Corrupt Elf|art=Moira|exte=2}}{{Headshot-index|name=Corrupted Lupine|art=Moira}}{{Headshot-index|name=Crazy Horse|art=Moira|exte=Bl}}{{Headshot-index|name=Crazy Horse|art=Moira|exte=Br}}{{Headshot-index|name=Crazy Horse|art=Moira|exte=Wh}}{{Headshot-index|name=Cultist|exte=F|art=Moira}}{{Headshot-index|name=Cultist|exte=M|art=Moira}}{{Headshot-index|name=Cultist Barghest|art=Moira}}{{Headshot-index|name=Cultist Demontaur|art=Moira|exte=1}} |
|- | |- | ||
| − | |{{Headshot-index|name=Cultist Evangelist|art=Moira}}{{Headshot-index|name=Cultist Psion|art=Moira}}{{Headshot-index|name=Cultist Shieldbearer|art=Moira}}{{Headshot-index|name=Cultist Temptress|art=Moira}}{{Headshot-index|name=Dragon Shaman|art=Moira}}{{Headshot-index|name=Eldritch Tentacle|art=Moira}}{{Headshot-index|name=Elf Guard|art=Moira|exte=1}}{{Headshot-index|name=Elf Guard|art=Moira|exte=2}}{{Headshot-index|name=Estelle | + | |{{Headshot-index|name=Cultist Demontaur|art=Moira|exte=2}}{{Headshot-index|name=Cultist Evangelist|art=Moira}}{{Headshot-index|name=Cultist Psion|art=Moira}}{{Headshot-index|name=Cultist Shieldbearer|art=Moira}}{{Headshot-index|name=Cultist Temptress|art=Moira}}{{Headshot-index|name=Dragon Shaman|art=Moira}}{{Headshot-index|name=Eldritch Tentacle|art=Moira}}{{Headshot-index|name=Elf Guard|art=Moira|exte=1}}{{Headshot-index|name=Elf Guard|art=Moira|exte=2}}{{Headshot-index|name=Estelle|art=Moira}} |
|- | |- | ||
| − | |{{Headshot-index|name=Flame Knight|art=Moira}}{{Headshot-index|name=Flaming Bull|art=Moira}}{{Headshot-index|name=Frost Wyvern|art=Moira}}{{Headshot-index|name=Frost Elk|art=Moira}}{{WikiHeadshot-index|name=Fungal Base}}{{Headshot-index|name=Gray-Furred Slaver|art=Moira}}{{Headshot-index|name=Gray Jelly|art=Moira}}{{Headshot-index|name=Grungendyr|art=Moira}}{{Headshot-index|name=Harpy Storm Cleric | + | |{{Headshot-index|name=Flame Dancer|art=Moira}}{{Headshot-index|name=Flame Knight|art=Moira}}{{Headshot-index|name=Flaming Bull|art=Moira}}{{Headshot-index|name=Frost Wyvern|art=Moira}}{{Headshot-index|name=Frost Elk|art=Moira}}{{WikiHeadshot-index|name=Fungal Base}}{{Headshot-index|name=Gray-Furred Slaver|art=Moira}}{{Headshot-index|name=Gray Jelly|art=Moira}}{{Headshot-index|name=Grungendyr|art=Moira}}{{Headshot-index|name=Harpy Storm Cleric|art=Moira}} |
|- | |- | ||
| − | |{{Headshot-index|name=Harem Spirit ♀|art=Moira}}{{Headshot-index|name=Harem Spirit ♂|art=Moira}}{{Headshot-index|name=Head-Slicing Wraith|art=Moira}}{{Headshot-index|name=Hobgoblin Thief|art=Moira}}{{Headshot-index|name=Hobgoblin Thug|art=Moira}}{{Headshot-index|name=Ice Troll|art=Moira}}{{Headshot-index|name=Imitre|art=Moira}}{{Headshot-index|name=Imp Jester|art=Moira}}{{Headshot-index|name=Incandescent Husk|art=Moira | + | |{{Headshot-index|name=Harpy Stormbreaker|art=Moira}}{{Headshot-index|name=Harem Spirit ♀|art=Moira}}{{Headshot-index|name=Harem Spirit ♂|art=Moira}}{{Headshot-index|name=Head-Slicing Wraith|art=Moira}}{{Headshot-index|name=Hobgoblin Thief|art=Moira}}{{Headshot-index|name=Hobgoblin Thug|art=Moira}}{{Headshot-index|name=Ice Troll|art=Moira}}{{Headshot-index|name=Imitre|art=Moira}}{{Headshot-index|name=Imp Jester|art=Moira}}{{Headshot-index|name=Incandescent Husk|art=Moira}} |
|- | |- | ||
| − | |{{Headshot-index|name=Infested Druid|art=Moira|exte=2}}{{Headshot-index|name=Infested Druid|art=Moira|exte=3}}{{Headshot-index|name=Jan|art=Moira}}{{Headshot-index|name=Jotun Female|art=Moira}}{{Headshot-index|name=Jotun Ghost|art=Moira}}{{Headshot-index|name=Jotun Male|art=Moira}}{{Headshot-index|name=Kane|art=Moira}}{{Headshot-index|name=Kazuo|art=Moira|exte=Armored}}{{Headshot-index|name=Kitsune Enchantress | + | |{{Headshot-index|name=Infested Druid|art=Moira|exte=1}}{{Headshot-index|name=Infested Druid|art=Moira|exte=2}}{{Headshot-index|name=Infested Druid|art=Moira|exte=3}}{{Headshot-index|name=Jan|art=Moira}}{{Headshot-index|name=Jotun Female|art=Moira}}{{Headshot-index|name=Jotun Ghost|art=Moira}}{{Headshot-index|name=Jotun Male|art=Moira}}{{Headshot-index|name=Kane|art=Moira}}{{Headshot-index|name=Kazuo|art=Moira|exte=Armored}}{{Headshot-index|name=Kitsune Enchantress|art=Moira}} |
|- | |- | ||
| − | |{{Headshot-index|name=Kitsune | + | |{{Headshot-index|name=Kitsune Geomancer|art=Moira}}{{Headshot-index|name=Kitsune Protector|art=Moira}}{{Headshot-index|name=Kitsune Spellblade|art=Moira}}{{Headshot-index|name=Kitsune Trickster|art=Moira}}{{Headshot-index|name=Kobold|art=Moira|exte=Female}}{{Headshot-index|name=Kobold|art=Moira|exte=Male}}{{Headshot-index|name=Kobold Slinger|art=Moira}}{{Headshot-index|name=Kobold Warrior|art=Moira}}{{Headshot-index|name=Korlic|art=Moira}}{{Headshot-index|name=Krot|art=Moira}} |
|- | |- | ||
| − | |{{Headshot-index|name=Leothran Brute|art=Moira}}{{Headshot-index|name=Leothran Fighter|art=Moira}}{{Headshot-index|name=Leothran Shaman|art=Moira}}{{Headshot-index|name=Liliana|art=Moira}}{{Headshot-index|name=Male Wyvern|art=Moira}}{{Headshot-index|name=Magma Golem|art=Moira}}{{Headshot-index|name=Minotaur Axeman|art=Moira}} | + | |{{Headshot-index|name=Layven|art=Moira}}{{Headshot-index|name=Leothran Brute|art=Moira}}{{Headshot-index|name=Leothran Fighter|art=Moira}}{{Headshot-index|name=Leothran Shaman|art=Moira}}{{Headshot-index|name=Liliana|art=Moira}}{{Headshot-index|name=Male Wyvern|art=Moira}}{{Headshot-index|name=Magma Golem|art=Moira}}{{Headshot-index|name=Minotaur Axeman|art=Moira}} |
|}</div></div></div></center> | |}</div></div></div></center> | ||
| Line 2,380: | Line 2,534: | ||
|valign="top" width="20%"|[[Arille]]<tabber> | |valign="top" width="20%"|[[Arille]]<tabber> | ||
Dom=[[File:Arille-Moira-CG-Dom.png|300px]]<br>Found within the First sex scene with [[Arille]] | Dom=[[File:Arille-Moira-CG-Dom.png|300px]]<br>Found within the First sex scene with [[Arille]] | ||
| + | </tabber> | ||
| + | |valign="top" width="20%"|[[Arona]]<tabber> | ||
| + | Zoomed in=[[File:Arona-Moira-CG-SpiritTotem-ZM.png|300px|center]]<br>Found in combat bust and '''Appearance'''<br>while the [[Spirit Totem]] set is equipped | ||
| + | |-| | ||
| + | Full=[[File:Arona-Moira-CG-SpiritTotem.png|300px|center]]<br>Found in combat bust and '''Appearance'''<br>while the [[Spirit Totem]] set is equipped | ||
</tabber> | </tabber> | ||
|valign="top" width="20%"|[[Atugia]]<tabber> | |valign="top" width="20%"|[[Atugia]]<tabber> | ||
Atugia x Brint Voyeur=[[File:Atugia-Moira-CG-Brint-Voyeur.png|300px]]<br>Found in Atugia's '''Voyeur''' sex scene with '''[[Brint]]''' | Atugia x Brint Voyeur=[[File:Atugia-Moira-CG-Brint-Voyeur.png|300px]]<br>Found in Atugia's '''Voyeur''' sex scene with '''[[Brint]]''' | ||
| + | |-| | ||
| + | Runic Berserker=[[File:Atugia-Moira-CG-RunicBerserker.png|300px]]<br>Found in combat bust and '''Appearance'''<br>while the [[Runic Berserker]] set is equipped | ||
</tabber> | </tabber> | ||
|valign="top" width="20%"|[[Azyrran]] | |valign="top" width="20%"|[[Azyrran]] | ||
| Line 2,392: | Line 2,553: | ||
</tabber> | </tabber> | ||
}} | }} | ||
| − | |valign="top | + | |- |
| + | |valign="top"|[[Brint]]/[[Brienne]]{{#tag:tabber| | ||
Brint=<tabber> | Brint=<tabber> | ||
Doggy=[[File:Brint-Moira-CG-Doggy.png|300px]]<br>Found within Brint's '''Kneeling Fuck''' sex scene | Doggy=[[File:Brint-Moira-CG-Doggy.png|300px]]<br>Found within Brint's '''Kneeling Fuck''' sex scene | ||
| Line 2,411: | Line 2,573: | ||
</tabber> | </tabber> | ||
}} | }} | ||
| − | |||
|valign="top"|[[Cait]]<tabber> | |valign="top"|[[Cait]]<tabber> | ||
Sun-Dancer's Silks=[[File:Cait-Moira-CG-SunDancer.png|300px]]<br>Found in combat bust and '''Appearance'''<br>while the [[Sun-Dancer's Silks]] set is equipped | Sun-Dancer's Silks=[[File:Cait-Moira-CG-SunDancer.png|300px]]<br>Found in combat bust and '''Appearance'''<br>while the [[Sun-Dancer's Silks]] set is equipped | ||
| + | |-| | ||
| + | Hexblade Leathers=[[File:Cait-Moira-HexbladeLeathers.png|300px]]<br>Found in combat bust and '''Appearance'''<br>while the [[Companion_Sets#Hexblade_Leathers|Hexblade Leathers]] set is equipped | ||
</tabber> | </tabber> | ||
|valign="top"|[[Cassia]] & [[Laura]]<tabber> | |valign="top"|[[Cassia]] & [[Laura]]<tabber> | ||
| Line 2,426: | Line 2,589: | ||
Warrior Queen=[[File:Etheryn-Moira-CG-WarriorQueen.png|300px]]<br>Found in combat bust and '''Appearance'''<br>while the [[Warrior Queen]] set is equipped | Warrior Queen=[[File:Etheryn-Moira-CG-WarriorQueen.png|300px]]<br>Found in combat bust and '''Appearance'''<br>while the [[Warrior Queen]] set is equipped | ||
</tabber> | </tabber> | ||
| + | |- | ||
|valign="top"|[[Hana]] & [[Kaede]]<tabber> | |valign="top"|[[Hana]] & [[Kaede]]<tabber> | ||
Baby=[[File:Hana-Moira-CG-Baby.png|300px]]<br>Found within Hana's first birth scene | Baby=[[File:Hana-Moira-CG-Baby.png|300px]]<br>Found within Hana's first birth scene | ||
</tabber> | </tabber> | ||
| − | |||
|valign="top"|[[Kiyoko]]<tabber> | |valign="top"|[[Kiyoko]]<tabber> | ||
Rindo=[[File:Kiyoko-Moira-CG-Rindo.png|300px]]<br>Found within [[Rindo]]'s '''Guidance''' sex scene | Rindo=[[File:Kiyoko-Moira-CG-Rindo.png|300px]]<br>Found within [[Rindo]]'s '''Guidance''' sex scene | ||
| Line 2,446: | Line 2,609: | ||
Basil=[[File:Tarah-Moira-CG-Basil.png|300px]]<br>Found within [[Tarah]]'s first birth scene, and visiting him at the [[Hawkethorne Nursery]] | Basil=[[File:Tarah-Moira-CG-Basil.png|300px]]<br>Found within [[Tarah]]'s first birth scene, and visiting him at the [[Hawkethorne Nursery]] | ||
</tabber> | </tabber> | ||
| + | |- | ||
|valign="top"|[[Vatia]] & [[Vera]]<tabber> | |valign="top"|[[Vatia]] & [[Vera]]<tabber> | ||
Kiddo=[[File:Vatia-Moira-CG-Kiddo.png|300px]]<br>Found within Vatia's 4th pregnancy event scene<br>and in her '''Kids''' option at the [[Wayfort]]<br>Featuring [[Vatia]] and [[Vera]] | Kiddo=[[File:Vatia-Moira-CG-Kiddo.png|300px]]<br>Found within Vatia's 4th pregnancy event scene<br>and in her '''Kids''' option at the [[Wayfort]]<br>Featuring [[Vatia]] and [[Vera]] | ||
| + | </tabber> | ||
| + | |valign="top"|[[Viviane]]<tabber> | ||
| + | Cantrix Set=[[File:Viviane-Moira-CG-CantrixSet.png|350px]]<br>Found in combat bust and '''Appearance'''<br>while the [[Cantrix Set]] set is equipped | ||
</tabber> | </tabber> | ||
|}</div></div></div></center> | |}</div></div></div></center> | ||
Latest revision as of 17:46, 29 August 2025

|
Note: Page may take a short while to fully load due to the density of images present, thank you for your patience. |
Lead Artist for CoC2
Catch more of Moira at:
 Twitter - https://twitter.com/art_moira
Full Body
A - I


J - R


S - Z


Busts
A - E
| Aafi
|
Aileh (pregnant)
|
Alante
|
Alice
|
Ambra
|
Amethysta
|
| Amina
|
Ander & Ria
|
Archdruid Xadaron
|
Arened
|
Arille
|
Asgeir
|
| Ashelander
|
Aster
|
Asynja
|
Atugia's Parents
|
Aunora & Ikora
|
Aurera & Claire
|
| Barnaphous
|
Brienne
|
Brint
|
Brother Sanders
|
Byvernia
|
Caedlan
|
| Captain Fenraus
|
Captain Livernon
|
Cassia
|
Cassidy
|
Cat Harem (Calill, Selima, & Yset)
|
Centaur Caravan
|
| Clementine
|
Coraline
|
Count Victor
|
Cultist Reaver
|
Daliza
|
Darius
|
| Decima
|
Dior & Betas
|
Doireann
|
Drifa
|
Edessari & Wredi
|
Eira
|
| Electirc Eel
|
Elosa
|
Elthara (pregnant)
|
Elyon
|
Eubicha (pregnant)
|
Etheryn Clone
|
| Evelyn (dragon)
|


F - J


K - O


P - T


U - Z


Headshots
A - M
Abyssal Thing Ashelander Ashelander Batfolk Mugger Batfolk Mugger Batfolk Mugger Batfolk Mugger Broken Psyche Broken Psyche Broken Psyche Broken Psyche Broken Psyche Broken Psyche Captain Eyslaine Captain Eyslaine Cave Bear Cave Bear Corrupt Dragon Corrupt Dragon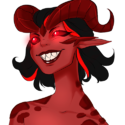
|
Corrupt Elf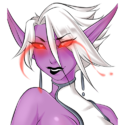 Corrupt Elf Corrupt Elf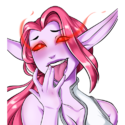 Corrupted Lupine Corrupted Lupine Crazy Horse Crazy Horse Crazy Horse Crazy Horse Crazy Horse Crazy Horse Cultist Cultist Cultist Cultist Cultist Barghest Cultist Barghest Cultist Demontaur Cultist Demontaur
|
Cultist Demontaur Cultist Evangelist Cultist Evangelist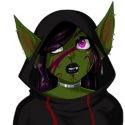 Cultist Psion Cultist Psion Cultist Shieldbearer Cultist Shieldbearer Cultist Temptress Cultist Temptress Dragon Shaman Dragon Shaman Eldritch Tentacle Eldritch Tentacle Elf Guard Elf Guard Elf Guard Elf Guard Estelle Estelle
|
Flame Dancer Flame Knight Flame Knight Flaming Bull Flaming Bull Frost Wyvern Frost Wyvern Frost Elk Frost Elk Fungal Base Fungal Base Gray-Furred Slaver Gray-Furred Slaver Gray Jelly Gray Jelly Grungendyr Grungendyr Harpy Storm Cleric Harpy Storm Cleric
|
Harpy Stormbreaker Harem Spirit ♀ Harem Spirit ♀ Harem Spirit ♂ Harem Spirit ♂ Head-Slicing Wraith Head-Slicing Wraith Hobgoblin Thief Hobgoblin Thief Hobgoblin Thug Hobgoblin Thug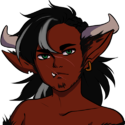 Ice Troll Ice Troll Imitre Imitre Imp Jester Imp Jester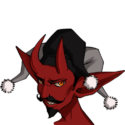 Incandescent Husk Incandescent Husk
|
Infested Druid Infested Druid Infested Druid Infested Druid Infested Druid Jan Jan Jotun Female Jotun Female Jotun Ghost Jotun Ghost Jotun Male Jotun Male Kane Kane Kazuo Kazuo Kitsune Enchantress Kitsune Enchantress
|
Kitsune Geomancer Kitsune Protector Kitsune Protector Kitsune Spellblade Kitsune Spellblade Kitsune Trickster Kitsune Trickster Kobold Kobold Kobold Kobold Kobold Slinger Kobold Slinger Kobold Warrior Kobold Warrior Korlic Korlic Krot Krot
|
Layven Leothran Brute Leothran Brute Leothran Fighter Leothran Fighter Leothran Shaman Leothran Shaman Liliana Liliana Male Wyvern Male Wyvern Magma Golem Magma Golem Minotaur Axeman Minotaur Axeman
|
N - Z
Orc Berserker Orc Huntress Orc Huntress Orc Shaman Orc Shaman Orc Warrior Orc Warrior Puppet Puppet Quintillus (firewalk) Quintillus (firewalk) Rhesia Rhesia Ringren Ringren Roc Roc Ronok Ronok
|
Rune Stone Selkie Huntress Selkie Huntress Selkie Songstress Selkie Songstress Shieldmaiden Shieldmaiden Silas Silas Siorcanna Alpha Siorcanna Alpha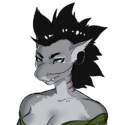 Siorcanna Hunter Siorcanna Hunter Siorcanna Shaman Siorcanna Shaman Sky Arrow Sky Arrow
|
Sluasaid Sluasaid (silly) Sluasaid (silly) Sporeling Sporeling Taothian Taothian Taothian Mage Taothian Mage Teeth-and-Fur Teeth-and-Fur Unstable Elemental Unstable Elemental Valkyrie (Healer) Valkyrie (Healer) Valkyrie (Tank) Valkyrie (Tank) Valkyrie (Warrior) Valkyrie (Warrior)
|
Walrus Wraith Chimera Wraith Chimera Wraith Chimera Wraith Chimera Wraith Raider Wraith Raider Wraith Shadowcaster Wraith Shadowcaster Wraith Troll Wraith Troll Zander Zander
|
CGs
| Aileh
|
Arille
|
Arona |
Atugia
|
Azyrran |
| Brint/Brienne
|
Cait
|
Cassia & Laura
|
Character Creation | Etheryn
|
| Hana & Kaede
|
Kiyoko
|
Mai
|
Orlaith
|
Tarah
|
| Vatia & Vera | Viviane
|


Other Artworks
| Kinu
|
Kiyoko
|
Kohaku
|


